Shaping a DIY Guitar Headstock
Share
 The peg-head of most of our DIY Guitar Kits have been left extra-long to allow you the chance to express your individuality and make a guitar that is truly your own. If the peg-head looks a little irregular shaped, then you are welcome to re-shape however you wish – but this is not compulsory. First, decide on the shape of the headstock that you would like to use and with a pencil draw the outline on the sides of the peg-head. We can also supply you with templates of original head stock shapes should you wish. You can print these, cut them out, stick them on your headstock and then cut around them. Please contact us if you would like the templates.
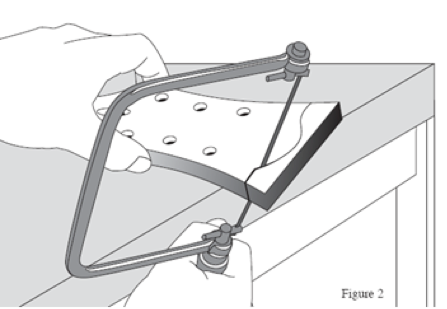
Using a band saw or simple coping saw, cut out the shape of your headstock (see Figure 2). A half round file or high grit sand paper can be used to level the top edge of the peg head. Finally, the edge should be sanded smooth with fine fine grit sandpaper. It will be easier to achieve straight edges with a manual coping or band saw, for more rounded edges we suggest an electric coping saw.
Make sure you don't cut too close to the tuning peg holes! For best results, shape the headstock prior to any paint or clear sealant being applied to the neck.
*Note: Some headstock shapes are protected by trademark restrictions and we do not recommend that you use them.


1 comment
Morning
We purchased the Explorer kit from you last year and we have now finished the woodwork and painting the Guitar, unfortunately we have misplaced the instillation instructions for the hardware.
Please could you forward me the link to a PDF or send me a copy if the hardware installation instructions?
Regards Miles Riordan